Publishing on the Marketplace
The Splatware Marketplace lets you share your 3D models with the world — either for free or as paid listings. Creators can earn revenue, build a portfolio, or simply distribute assets to collaborators and clients.
This guide explains how to become a publisher, create listings, set prices, and keep your models up to date, all using the built-in Create Listing tool.
Becoming a Publisher
Before you can list models on the Marketplace, you need to enable publishing by accepting the Marketplace Terms & Conditions. This is done inside the Create Listing UI.

How to enable publishing
- Open any processed model or capture in your account.
- Click the Settings or Create Listing button.
- In the Create Listing panel, review the Marketplace Terms & Conditions.
- Check the box to accept the terms.
Once accepted, your account is enabled as a publisher. You can create free and paid listings without any additional banking or payout setup yet – the process is intentionally streamlined and simple for early publishers.
Creating a Listing
After becoming a publisher, you can create listings directly from your projects. The Create Listing form lets you define how your model appears on the Marketplace and whether it is free or paid.
Create Listing UI
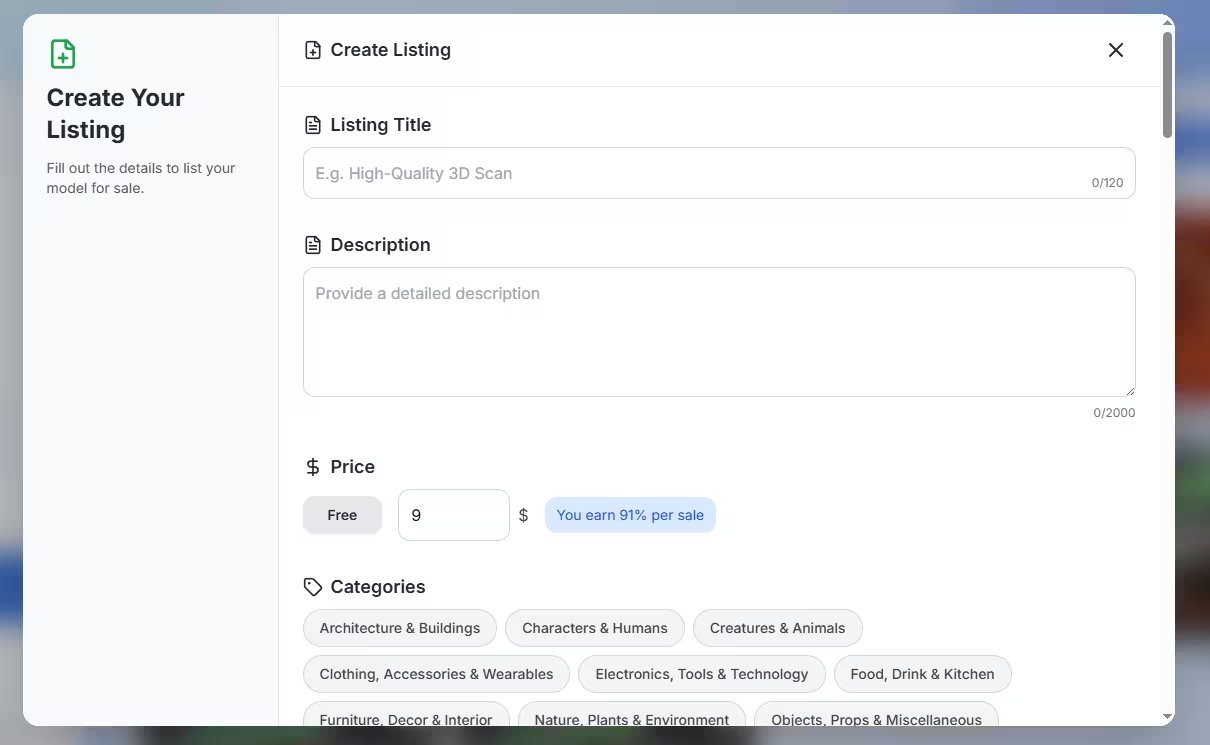
The Create Listing panel is designed to be clear and minimal. You will see a header:
“Create Your Listing – Fill out the details to list your model for sale.”
Listing Title
Short, descriptive name for your model. Example: High-Quality 3D Scan.
Limit: 0/120 characters – aim for something clear and searchable.
Description
A detailed description of what the buyer gets: capture method, resolution, intended use cases, license notes, and any technical details.
Limit: 0/2000 characters – enough room to describe environment, lighting, limitations, or recommended workflows.
Price
You can list models either as Free or as a paid asset with a custom price.
- Free toggle: mark the listing as free if you want anyone to use it.
- Price input: specify a price (e.g. 5.00 $) when the Free toggle is off.
Free and paid listings both appear in the same Marketplace, but filters can be used to discover them separately.
Categories
Select one or more categories that best describe your asset. Good categorization improves discoverability and relevance.
- Architecture & Buildings
- Characters & Humans
- Creatures & Animals
- Clothing, Accessories & Wearables
- Electronics, Tools & Technology
- Food, Drink & Kitchen
- Furniture, Decor & Interior
- Nature, Plants & Environment
- Objects, Props & Miscellaneous
- Scenes, Locations & Landscapes
- Vehicles, Transportation & Aircraft
- Weapons, Statues & Historical
- Art, Sculptures & Abstract
Select Models
Choose which of your existing Splatware models are attached to this listing.
Only finished and processed models (e.g. Nick Old Room 2) are shown here. Selected models will be delivered to buyers when they purchase or claim the listing.
Upload Thumbnails (Max. 8)
Add up to 8 thumbnails to showcase different angles, lighting conditions, or details of your scene.
Recommended: use clear, well-framed thumbnails that highlight the unique value of your model. Formats: JPG, PNG, or AVIF.
Finalize: List Model for Sale
Once all required fields are filled out, click List Model for Sale.
- Your listing becomes immediately available in the Marketplace (respecting any internal review process).
- You can open the listing directly after creation to preview it as a buyer would see it.
Pricing & Revenue Share
The Marketplace is designed to reward creators in a transparent and fair way while keeping the setup extremely simple.
Revenue split
- Creator share: 91% of the listing price.
- Platform share: 9% to cover infrastructure, storage, and marketplace operations.
There is no complex banking or payout configuration step yet. The goal is to let creators start publishing quickly, then gradually expand payout and reporting options over time.
You are free to mix free and paid listings in your portfolio. Many creators use free assets to showcase quality and build reputation, and use paid listings for premium work.
Managing & Updating Listings
Once a listing is created, it can be edited at any time. This includes changing text, thumbnails, categories, pricing, and even refreshing the underlying models.
Editing listing details
- Open the listing from your My Library or from its detail view.
- Update the title, description, price (including toggling between Free / paid).
- Change categories or refine them for better discovery.
- Add, reorder, or remove thumbnails.
Refreshing model content
If you improve or retrain a model (for example, higher resolution, better alignment, or updated textures), you can refresh the models attached to an existing listing.
- Select the updated model in your project / capture page.
- Use the Select Models section to re-link or refresh the selection.
- Save your changes; buyers will receive the current version going forward.
Historical buyers maintain access to the listing and will see the updated content, ensuring that improvements benefit everyone who owns the asset.
Best Practices & Next Steps
- Use clear titles and rich descriptions that explain what makes your model special.
- Upload multiple thumbnails showing different angles and close-up details.
- Choose relevant categories to appear in the right buyer searches.
- Experiment with pricing and observe how it affects interest and downloads.
- Keep models up to date as you improve your capture and training workflows.