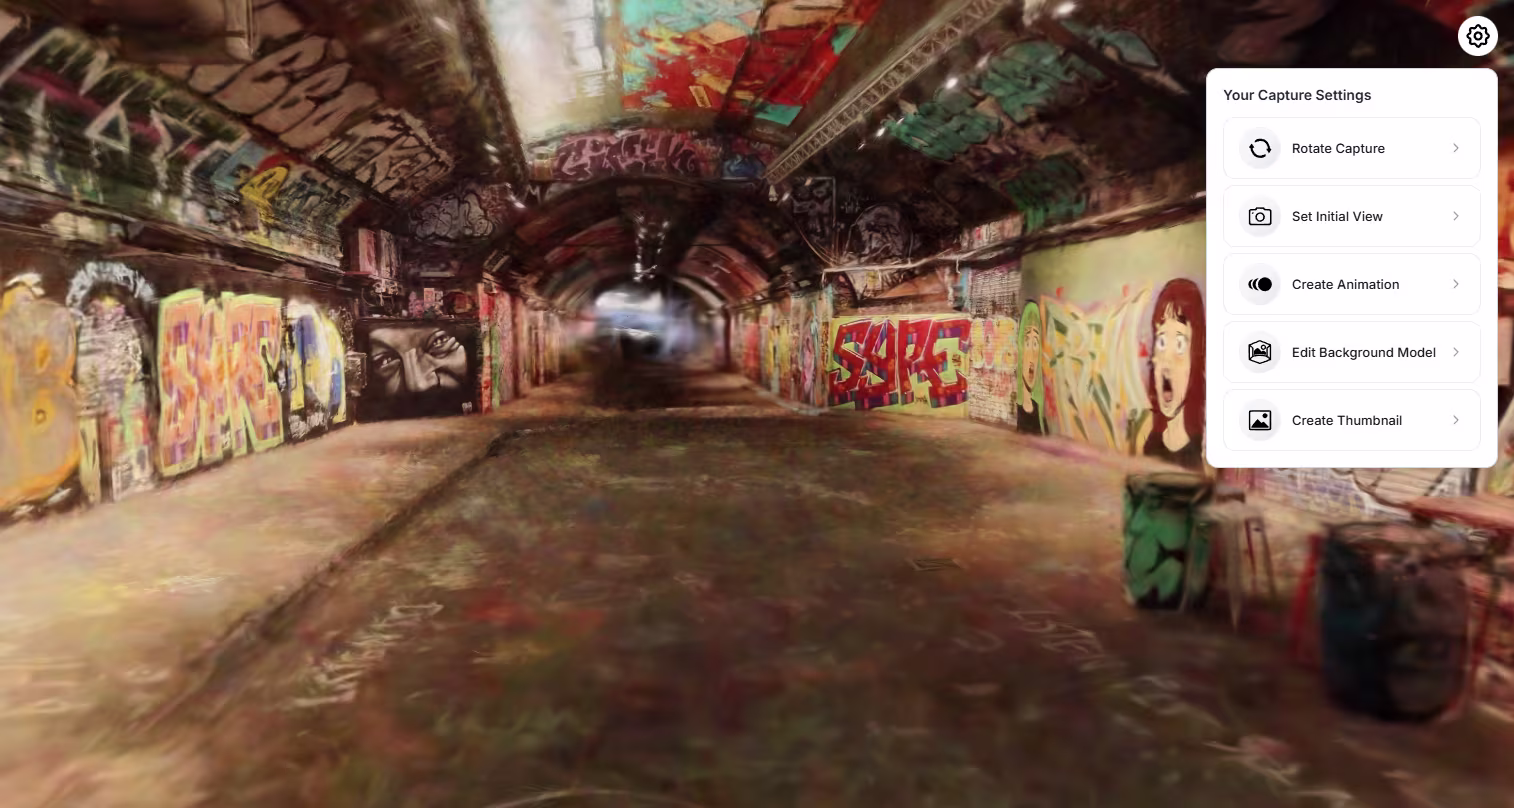
Capture Settings
The Capture Settings panel provides all essential scene-level tools used after the model was uploaded & trained succesfully. These settings are accessible directly inside the viewer via the settings icon in the top-right corner of the capture page (Only accessible by the owner of the Capture).
This page explains how each tool works, when you should use it, and what formats and configuration options are supported.
Rotate Model
Ensure your model is correctly oriented before sharing or exporting. The white arrow must point directly UP. If the model was captured sideways or upside-down, use the tools in this section to correct the orientation.
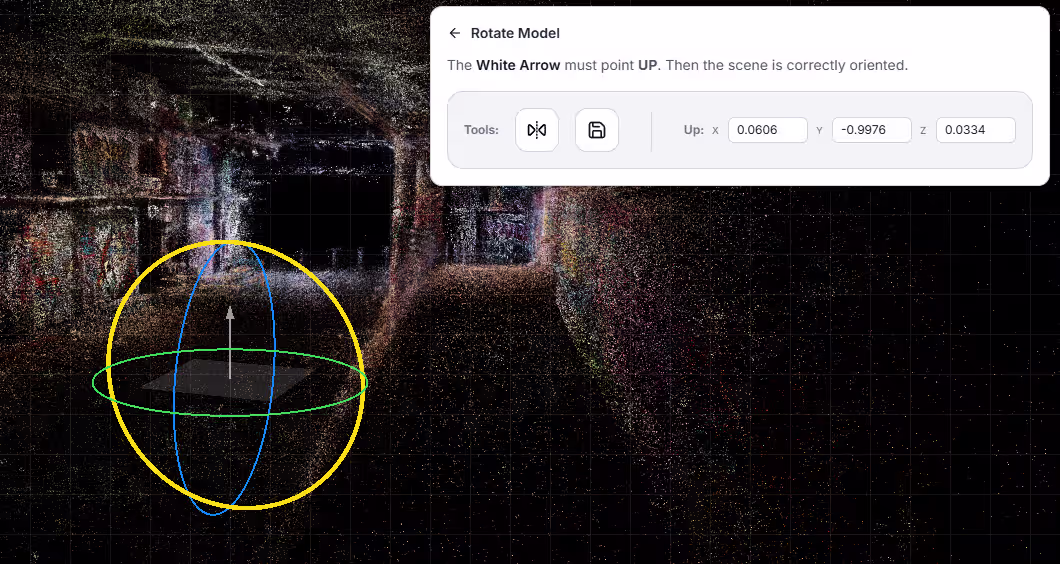
Tools
- Flip: Flips the entire scene on the horizontal axis.
- Flip Up: Corrects upside-down captures.
- Save Orientation: Permanently stores the corrected orientation.
Orientation Preview
The UI shows the currently applied orientation values:
- X: 0
- Y: -1
- Z: 2
Set Initial View
The Initial View defines what new users see when opening your scene. This is extremely important for presentation, storefront listings, and public sharing.
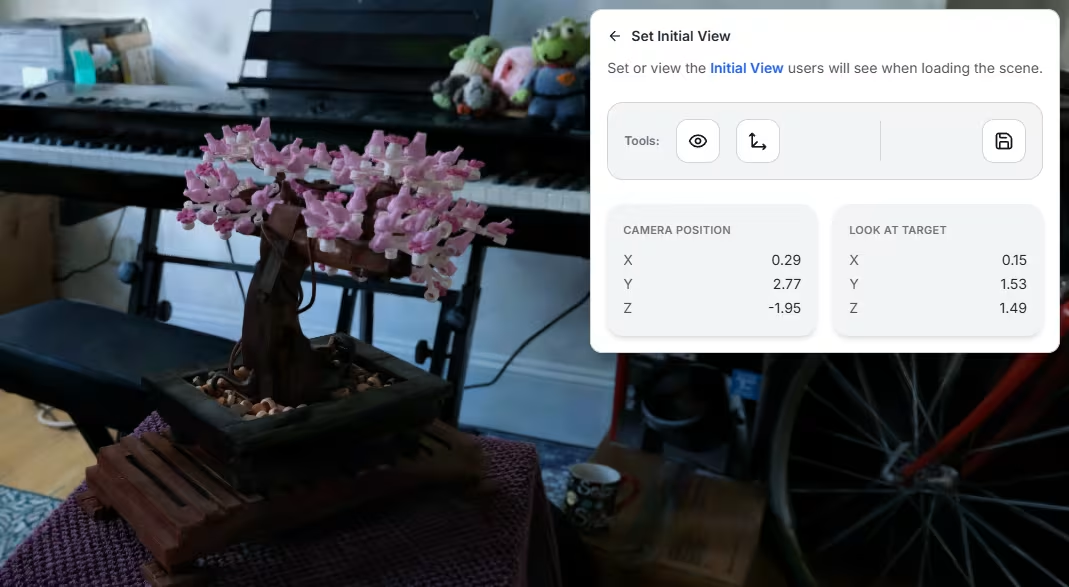
Tools
- View Initial View: Jump to the currently saved default camera angle.
- Save Current View: Store the current camera position as the initial view.
- Save Changes: Commit the view to your project data.
Camera Parameters
Displayed for transparency and debugging:
- Camera Position
X: 0.00 — Y: -5.00 — Z: 15.00 - Look At Target
X: 0.00 — Y: -2.45 — Z: -0.61
Create Camera Animation
Create an intro animation by defining keyframes along a timeline. This animates the camera between defined positions and is ideal for showcases, landing pages, or product reveals.
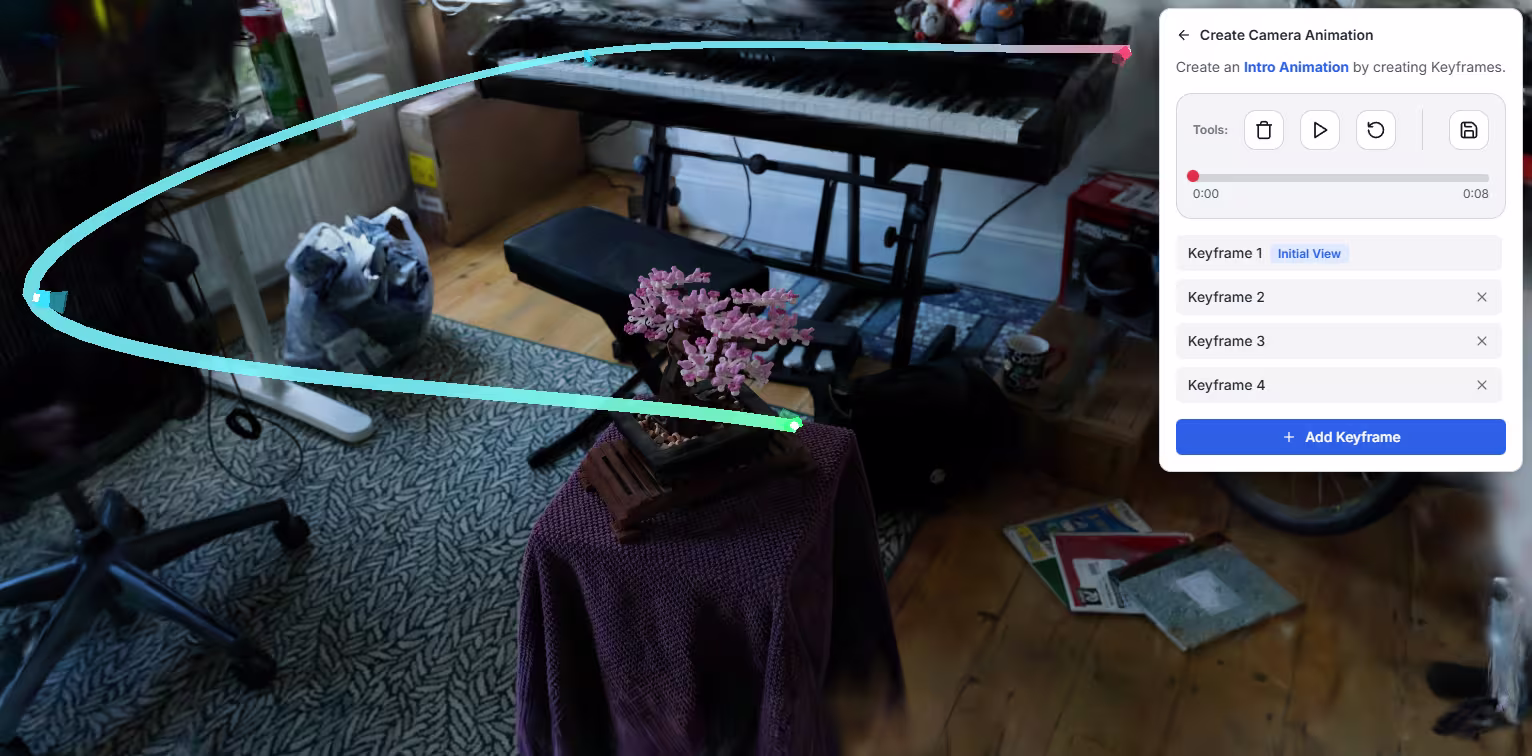
Tools
- Remove Animation: Deletes all keyframes.
- Play Animation: Previews the movement.
- Reset Timeline: Clears the time cursor to 0:00.
- Save Animation: Stores animation on the project.
If no keyframes exist, the UI will display:No keyframes yet.
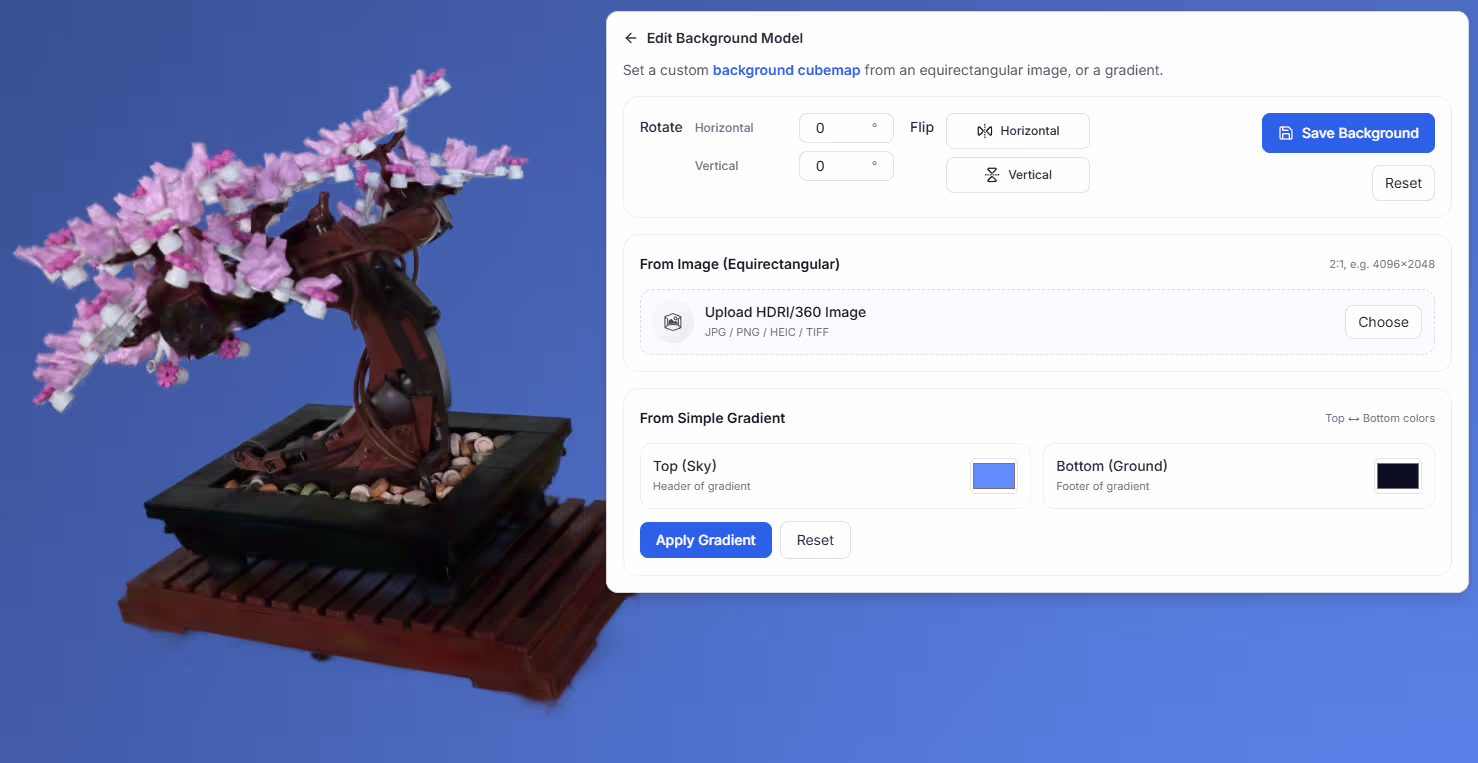
Edit Background Model
Replace or modify the cubemap background using equirectangular HDRIs or a simple color gradient. Great for photostudios, sky replacements, or artistic scenes.
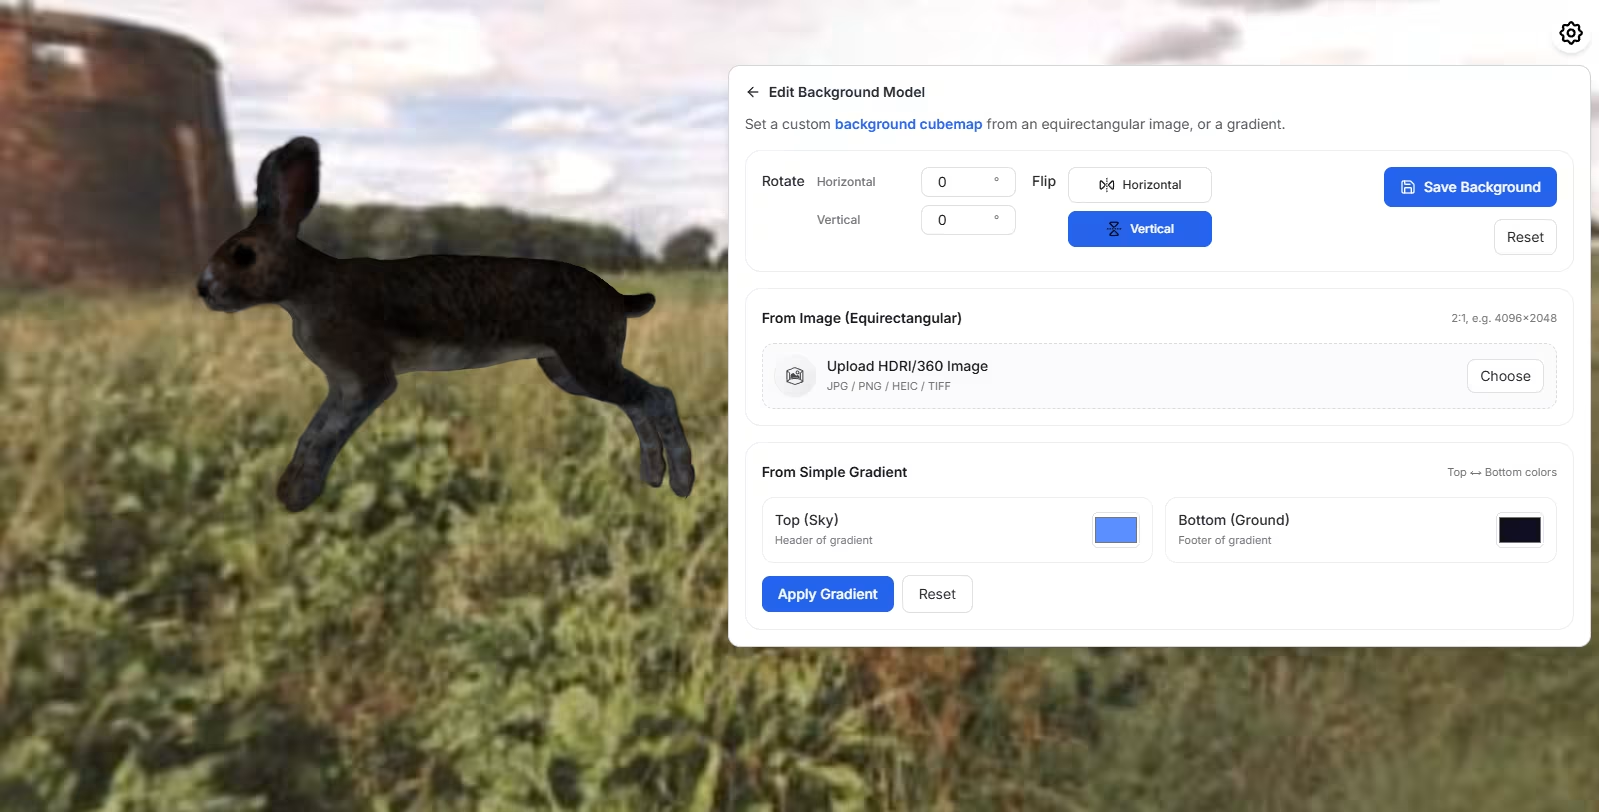
Rotation
Adjust the orientation of the background sphere:
- Horizontal (Yaw): 0–359°
- Vertical (Pitch): 0–359°
Flip
- Horizontal Flip
- Vertical Flip
Saving
- Save Background: Stores your cubemap.
- Reset: Restore original state.
From Image (Equirectangular)
Upload HDRI / 360 files. Supported formats:
- JPG
- PNG
- HEIC
- TIFF
From Simple Gradient
Blend between a sky-color and ground-color.
Create Thumbnail
Generate and manage the preview thumbnail used in galleries, embeds, links, and marketplace listings.
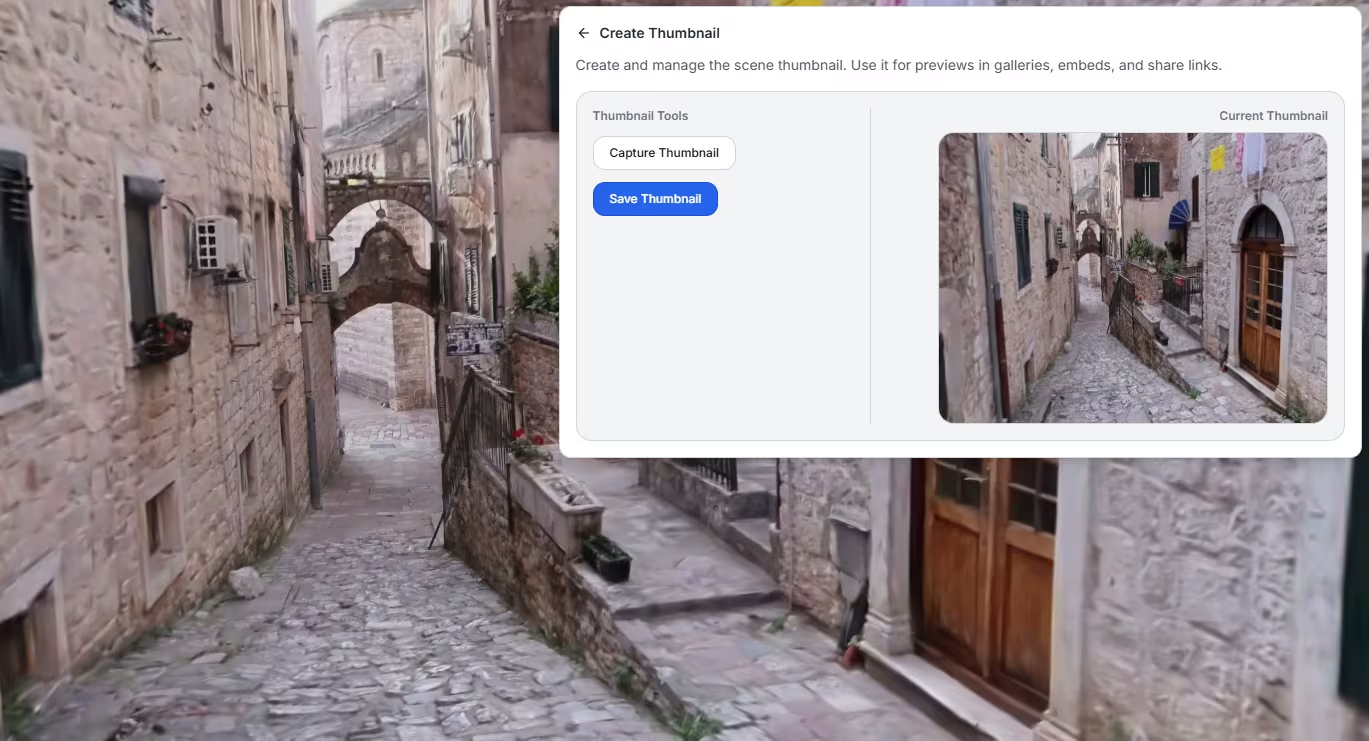
Thumbnail Tools
- Capture Thumbnail: Captures the current camera view at 390×292px.
- Save Thumbnail: Saves or overwrites the thumbnail.
Current Thumbnail
If no thumbnail exists, the UI displays:No thumbnail set yet.